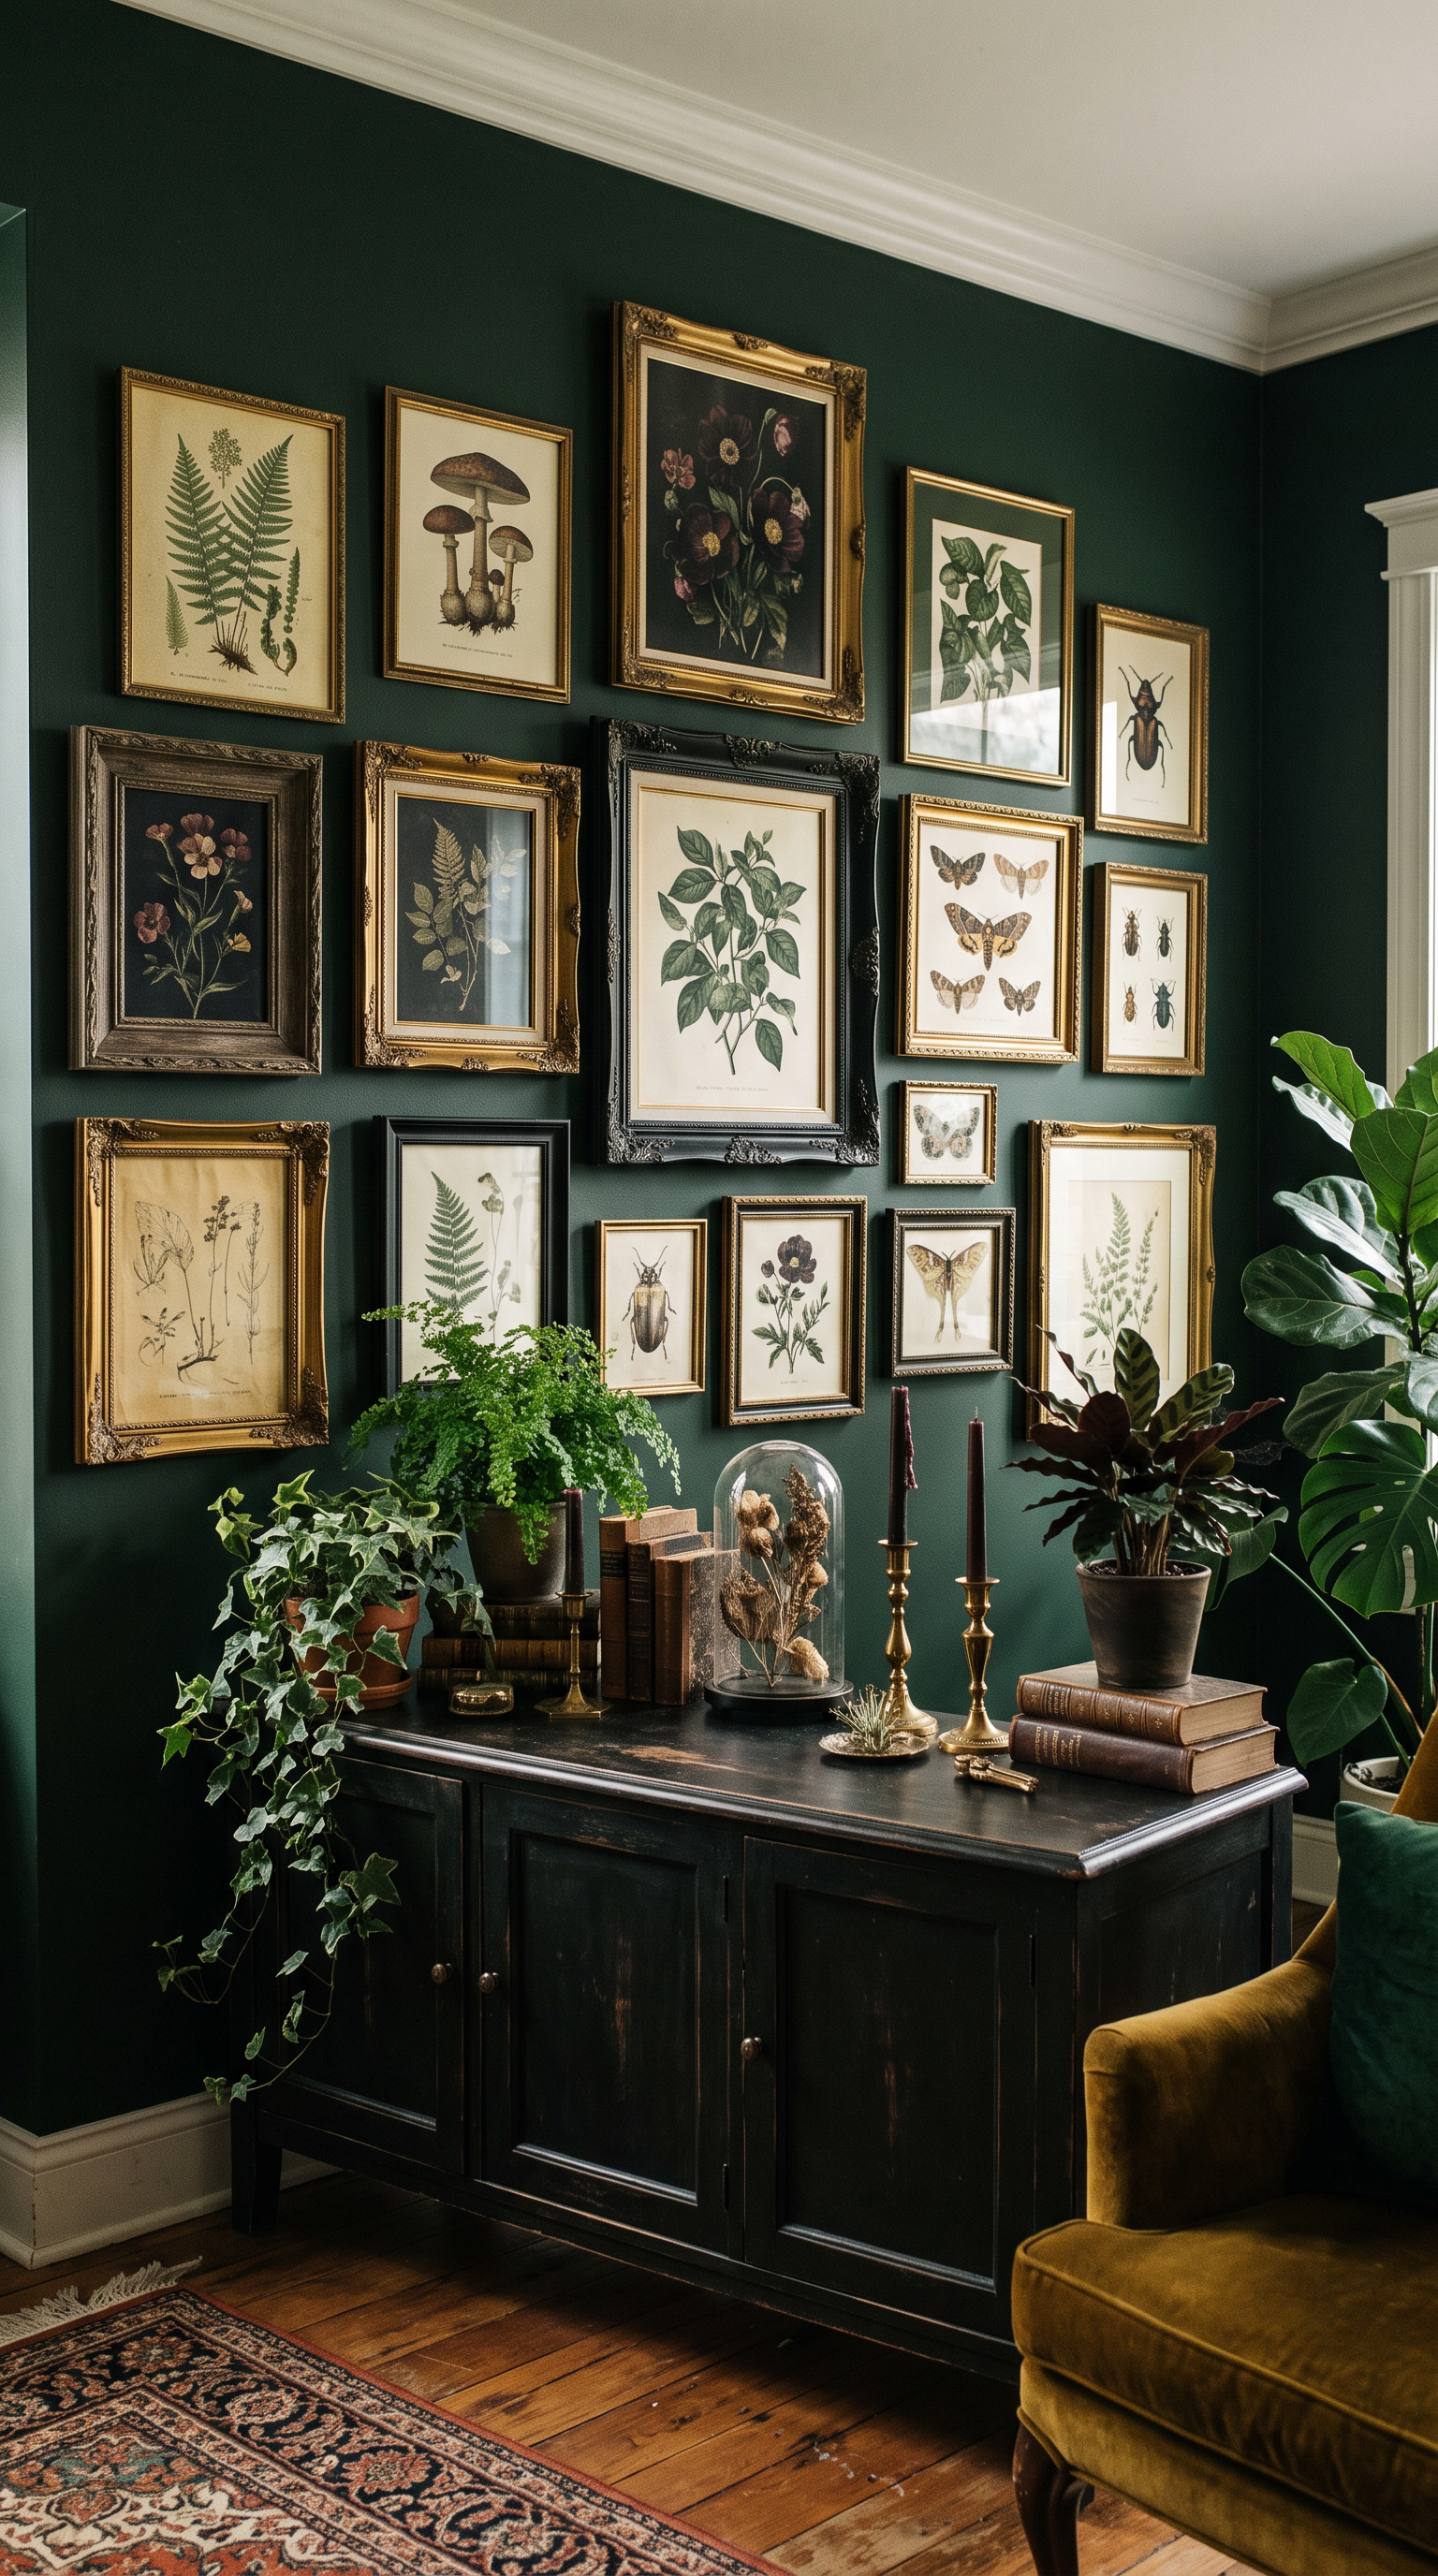
Three ways to arrange thrifted frames, pressed leaves, and botanical illustrations for a wall that feels like a page from an old field guide.

A fern frond in a tarnished brass frame can set the mood for an entire room. Add a few botanical illustrations and a pressed leaf from a favorite walk, and you have the beginnings of a gallery wall that feels collected over time. It’s a lovely way to carry the woodland feel of a green witch bedroom onto a blank wall above a dresser, beside the bed, or in a quiet reading corner.
Start with the space you have. A narrow strip of wall can hold a column of three small frames, while a wide stretch above a dresser gives you room to play. The three layouts below use the same simple ingredients, each with a different rhythm.
Gather your frames and botanicals
Look for secondhand frames in walnut, matte black, and aged brass. A mix of finishes gives the wall some depth, and repeating one finish at least twice helps the pieces feel connected. Check that each frame has intact glazing and a sound backing. An ornate frame with a worn finish can make a beautiful centerpiece, especially when the artwork inside is simple.

For the art, choose one or two detailed botanical illustrations and a few leaves with shapes you can recognize from across the room.

A lacy fern, a fan-shaped ginkgo leaf, and a slender sprig each bring something different to the arrangement. Press leaves between sheets of absorbent paper under a stack of books until they’re flat and completely dry. Then try them against warm ivory, muted olive, or charcoal cardstock before choosing a background. A pale fern against charcoal has a different presence than the same fern on cream.
1. The Field Guide Grid
Try it above a dresser or desk. Arrange six frames of the same outer size in two rows of three. Use botanical illustrations in the top-left, top-right, and bottom-center frames. Fill the other three with pressed leaves. The alternating pattern gives delicate specimens equal room to shine alongside more detailed artwork.

Matching ivory mats can tie together frames in different finishes. For a field-guide detail, add a tiny handwritten label beneath each pressed leaf with its name, if you know it, and the date or place you found it. Leave the same amount of space between each frame so the labels and foliage can be the details your eye settles on.
2. The Woodland Cluster
Try it on a wider wall where you have room to spread out. Start with a large fern illustration slightly left of center. Place a small brass frame with a pressed leaf above and to its right, then tuck a darker floral illustration below that. Add a pair of smaller pieces along the left edge, stepping one lower than the other. Aim for a loose outline that rises on one side, like a branch reaching toward the light.

Give the boldest illustration a quieter neighbor. A single pressed leaf next to an intricate wildflower print gives your eye somewhere to rest. If the grouping feels busy when you step back, try replacing one small print with a specimen on plain paper.
3. The Moonlit Column
Try it beside a window, a wardrobe, or a bedside table. Stack three frames along a shared centerline. Put a medium botanical illustration at the top, a small oval frame holding a pressed leaf in the middle, and a wider woodland print at the bottom. The changing widths give the column a little movement while keeping it narrow enough for an overlooked corner.

Use walnut or black for the two outer frames and let the oval frame be your touch of brass. For a moodier palette, choose illustrations with deep green or plum tones and mount the leaf on soft cream. A nearby lamp brings out the warmer tones in the frames after dark.
Test the arrangement before you hang it
Lay the frames on the floor first and take a photo so you can see the grouping at a glance. Once you like the arrangement, trace the frames onto scrap paper and tape the templates to the wall. Start with roughly two inches between frames, then adjust from across the room. If the gallery sits above furniture, check how the bottom row looks with the lamp, books, or plants you usually keep there.

Leave room for one piece that means something to you. It might be a leaf from the first cool walk of autumn or an illustration of a plant you’ve grown for years. That’s often the frame you’ll find yourself looking at longest.
If you were creating a dark botanical gallery wall, which layout would you choose, and what leaf or botanical print would you frame first?


Leave a Reply